
If you geek out when it comes to national parks or anything outdoors, my guess is Zion National Park is a top destination on you’re “places to visit” list. Zion is one of those places that has countless posts on Instagram or videos on YouTube showing off it’s beauty. The thing is though, you haven’t really experienced Zion’s true beauty until you have seen it for yourself. Whether you are visiting for the first time or a repeat visitor, this is the perfect travel guide for Zion National Park!

If you are looking for certain information about visiting Zion, just click on the section you want to jump ahead to:
When to Visit Zion
Okay, first things first, deciding the best time to visit Zion. Now, I understand not everyone has the freedom or flexibility to choose what time of year to travel. So, whether you can pick and choose your dates or if your dates are already set, let me give you some background information to help make the most of your trip no matter when you travel. If you are flexible, I definitely recommend taking some of these suggestions into consideration when choosing your dates.

You have probably already heard one major downside to visiting Zion is the crowds. This can be true especially if you are visiting during peak seasons. Here’s the thing, Zion is actually a canyon so the amount of trails and sites for people to visit are limited compared to other national parks.
Occasionally, some trails will close due to rock fall or bad weather conditions which leaves park guests with even less options. So my first piece of advice would be to try and visit Zion during it’s less popular seasons. Typically the fall or spring are prime visiting months when you will find a majority of the trails still open, but less crowded.
You will also find less crowds in the winter months. The only downside might be, not as many trails will be open due to weather conditions and it can get quite cold. The key is to just be prepared with the right gear and making sure you are still able to do all of the activities you are hoping to do.
If your only option is to visit Zion in the summer months, just be sure to plan ahead and pack your patience. If you plan on camping, book far in advance as campsites fill up quickly. Also, if you are on a budget, keep in mind hotel prices are usually higher during the summer months. Check out Booking.com for hotel deals in the area.
If you are looking to extend your Utah adventure, check out the Ultimate Mighty Five Road Trip!

Hiking Zion
Now that you have figured out when you are going to visit Zion National Park, lets talk about some of the best hikes with the best pixel perfect views.
All of the trail information comes from AllTrails. If you would like to download the app to help you navigate your next hiking adventure, check out AllTrails in your smartphone’s app store.
Angels Landing via Scouts Lookout
Angels Landing is probably the most iconic trail in Zion National Park. People come to Zion just to hike this trail and it is for a good reason. Angels Landing isn’t for the faint of heart but it sure does get your heart pumping. From the steep climb to the sheer drop-offs on either side of you the last half mile, this hike is an adventurers dream.
You will want to get off at shuttle stop #6 at the Grotto and head left to the trailhead. The trail starts out relatively flat but then begins to climb up the side of the mountain with a series of switchbacks. I recommend starting this hike in the morning as the first part of the hike is directly in the sun with not much shade in the afternoon.

After climbing for a little while you will be met with a welcomed break and cool breeze through properly named Refrigerator Canyon. Next you will come to the infamous Walter’s Wiggles, 21 switchbacks that are sure to get your legs burning and heart pumping! You will definitely earn that protein bar at the top.
Once you have conquered Walter’s Wiggles you will reach Scouts Landing. This is a great spot where those who do not want to do the next section can sit and wait and still enjoy a great view. You can also continue on the West Rim Trail and escape the crowds and get a different perspective on the canyon.
The final stretch (.5 mile one way) of Angels Landing is commonly referred to as the “chains section” or the “spine”. This section has you climbing about 500 feet with 800-1,000 feet drop-offs on either side of you. There are chains and carved out steps to help make the trek a little easier to navigate. I do not recommend taking children, any uneasy hikers or anyone in poor health on this part of the hike. However, if you are up for the challenge you will be rewarded with a stunning 360 degree view of the canyon. Just be sure to take your time and give everyone on the trail enough room to navigate the narrow path. Pack your patience.
Trail Stats:
Distance: 4.4 miles out & back
Elevation Gain: 1,604 feet
Estimated Duration: 3-4 hours
Difficulty: Hard
Observation Point via East Mesa

So you’re not exactly up for the level of danger Angels Landing might provide, but you still want the stunning pixel perfect shot of the canyon. Then this hike is for you! The length of the hike is longer than Angels Landing however, it is not as strenuous.
If you are staying in Springdale, you will want to drive through the park and exit out through the east entrance. The trailhead and parking for this trailhead is not inside the park. The best option for finding this trailhead is by using the directions on the AllTrails app.
Note: If you are completing this trail in the winter, be sure to check the road conditions as the last bit can be hard to drive if not in a 4WD vehicle.
Once you park and start the trail, you will enter into the park. A majority of the hike is relatively flat through the trees and feels very different then other trails in Zion. After about 2 1/2 miles you will come across one steep decline (incline coming back). As you get closer to the Observation Point, the trail becomes pretty sandy and the view will start to open up.
The view at the end of this trail is one of the most rewarding views. If you don’t believe me, just check out the photo above! You will be looking down onto the spine of Angels Landing and have an amazing 360 view. This is definitely a great spot to take a snack break and snap a few Instagram worthy shots. Just beware of the chipmunks! They will be very interested in your snacks.
This trail is perfect for all ages and skill levels who want to enjoy the iconic Zion canyon view!
Trail Stats:
Distance: 7 miles out & back
Elevation Gain: 702 ft
Estimated Duration: 3-4 hours
Difficulty: Moderate
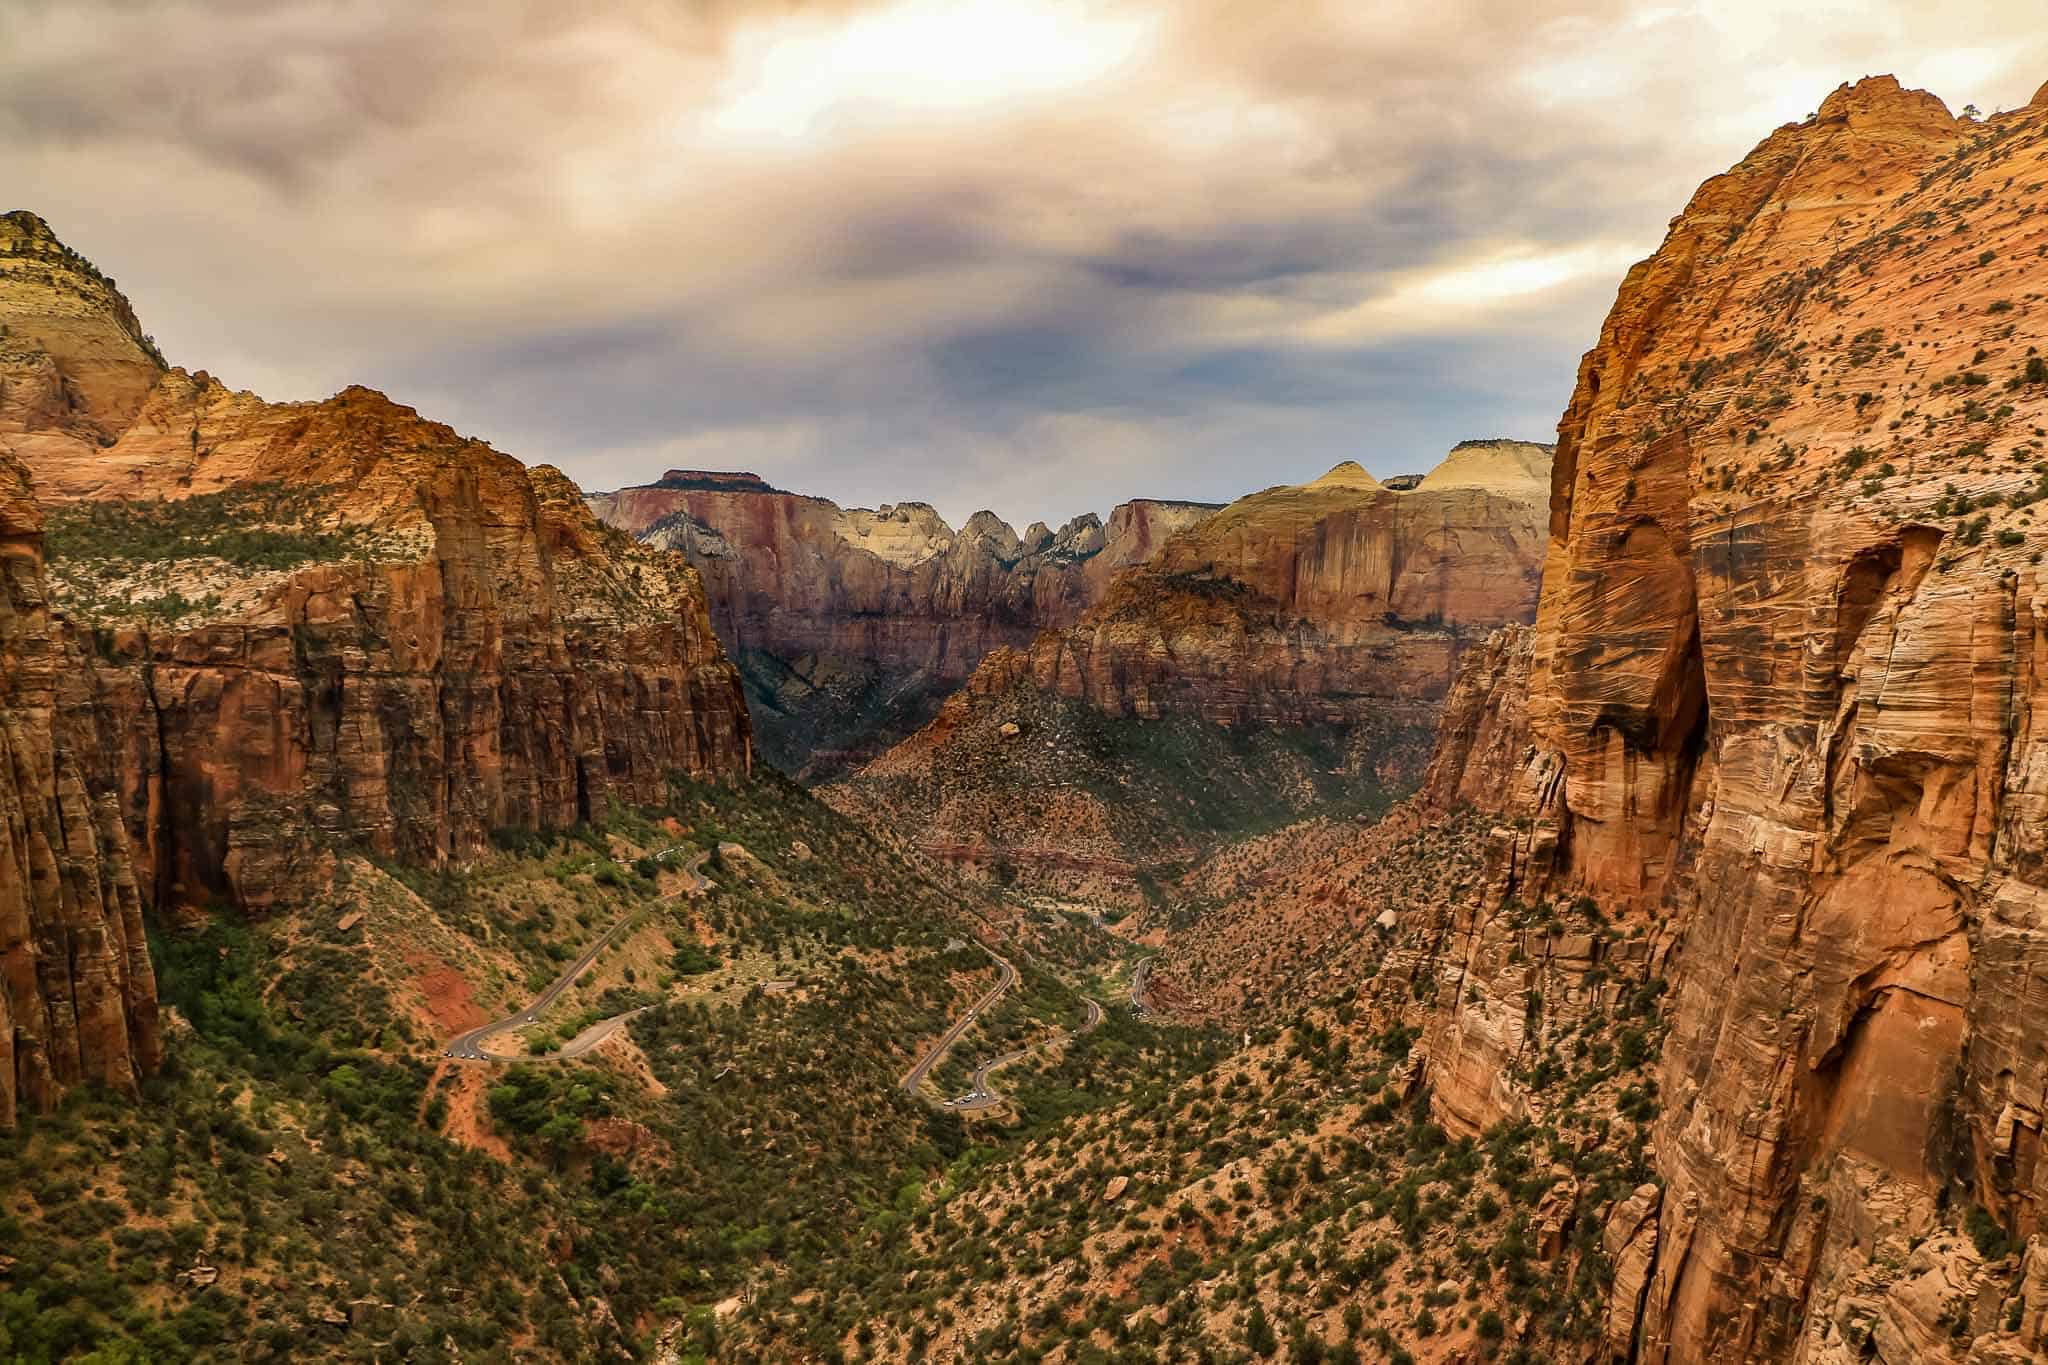
Zion Canyon Overlook Trail
When people think about Zion National Park, many different images come to mind. For some, the view from the Overlook Trail is what they picture. The Overlook Trail is a very short and easy out and back trail. The downside of this hike is the parking. There are two very small parking lots, one for each direction of the road. Once those are full, people tend to park along the side of the road where there is plenty of room to pull off.
The trailhead is right near the entrance to the tunnel and you will immediately climb some stairs. The trail bends and winds around and can be narrow in some parts. However, there are railings in the narrow sections. There are a few rocky sections and this trail is not completely flat, but I did witness someone hiking this trail in flip flops, which I do not recommend.

When you reach the end of the trail, there is plenty of room to spread out and capture the pixel perfect view. You will notice most of the people gravitate towards the big tall rocks to the left. But I recommend heading to the right and you can still climb up some rocks and get a great view but away from the people. Just be sure to be careful and cautious while navigating your way around as there are no railings or fences.
If you want to avoid the crowds or parking headache, I recommend completing this trail early in the morning or later in the day. You do not need to ride the shuttle to access this trail.
Trail Stats:
Distance: 1 mile out & back
Elevation Gain: 187 ft
Estimated Duration: 45 minutes- 1 hour
Difficulty: Easy
Emerald Pools
Emerald Pools is a loop so it can be completed many different ways. If you are visiting Zion between the months of March and November, you will need to ride the shuttle to get to the trailhead. You can get off at either the Grotto, the same stop as Angels Landing or you can get off at the stop prior which is the Zion Lodge.
Either stop you choose, you will head to the left to begin your hike. Again, since this trail is a loop you can choose to complete it either clockwise or counterclockwise. If you do not want to complete the entire loop you can also choose to make this trail an out & back route.

There are two sets of pools, the upper pools and the lower pools. Again depending on the time of year you are visiting, might change the fact if the pools are there or are frozen over. As you might guess, you will reach the lower pools first. If you are visiting during a warmer time of the year, you will be greeted with a waterfall before ascending the steps to the lower pools. Once you reach the top of the steps, you will spot the lower pool to the left. We found lots of families and kids taking a break here and playing in the water and scooted on past relatively quickly. In my opinion it wasn’t as grand as I was expecting.
After moving on from the lower pools, you will start to hike up more steps towards the upper pools. When we visited this part of the trail was quite sandy. We also overheard others mention when there is snow or it has rained, this part of the trail can become quite muddy or sloshy. So just be aware of what kind of terrain you might encounter and be sure to wear the proper footwear.
The upper pools again were pretty crowded but there was much more space to spread out and explore. We were greeted with another amazing waterfall.
This a great trail for everyone and provides just enough challenge even for those really experienced hikers. This hike is a little different as it does not offer the grand views as many of the previous hikes. However, the Emerald Pools trail has it’s own unique beauty and highlights.
Trail Stats:
Distance: 3 miles loop
Elevation Gain: 620 ft
Estimated Duration: 2-3 hours
Difficulty: Moderate
Watchman Trail
The Watchman trail is a great trail to start with if you are visiting Zion for the first time. It is fairly easy to access and isn’t as crowded as some of the more well known hikes in the park. This trail is also a great option because you don’t need to use the shuttle to access the trailhead. Once you are at the park’s visitor center, you will see signs directing you to the trailhead. The path starts out flat and follows along the Virgin River. Eventually it will start to take a turn to the right and you will begin ascending up the mountain.


The Watchman trail is great for all ages and skill levels. There are a few steep sections but nothing too strenuous. Once you reach the top, there is plenty of space to spread out from the crowd and check out the park below. While this view doesn’t provide the iconic shot down the canyon, it does give you a cool view of the town of Springdale and some of the park below.
At the top, there is also an option to take a short loop if you want to add on a little more mileage or are just up for more exploring! Even on a hot day, this hike is enjoyable!
Trail Stats:
Distance: 3.1 miles out & back
Elevation Gain: 636 ft
Estimated Duration: 1.5-2 hours
Difficulty: Moderate
Narrows
Full disclosure, I have not personally hiked this trail. However, along with Angels Landing, it is one of the most popular hikes in Zion National Park. The Narrows offers a few different options to explore. The first and most common is the walk along the river side. Most people will recommend you either bring your own gear or rent from one of the local gear shops. You will want waterproof shoes and some sort of walking stick or pole.

To access the trailhead for the Narrows, you will need to hop on a shuttle and get off at the final stop in the canyon (Temple of Sinawava). What draws visitors to this trail is it’s unique experience of hiking through the river and between the canyon walls. Although it is a cool experience, be prepared to be surrounded by hundreds of others who want the same experience.
On a hot summer day, this hike is definitely a great option to keep you cool. However, be sure to check the weather and use caution if rain is in the forecast as there can be flash flooding.
There are other ways to experience the Narrows that are less crowded but might require more experience hiking and cover more miles. If you are up for a bigger adventure, be sure to check with the park rangers about how to explore the Narrows.
Trail Stats:
Distance: 1.9 miles out & back
Elevation Gain: 193 ft
Estimated Duration: 1 hour
Difficulty: Easy
Getting Around the Park
If you are visiting Zion between March and November, most likely you will using the park’s shuttle service to access the trailheads. The shuttle is free to ride, but during peak season can be a headache to use as there will likely be long lines. Lines move pretty fast, but the best way to avoid the long lines is to head to the park early or start later in the day. Just be mindful of the heat. Be sure to check with the park rangers or the visitor center to see when the last shuttle leaves the canyon or you will have a long trek back to the parking lot.

Another option besides the shuttle is to rent bikes, especially eBikes. There are several options in the town of Springdale to rent an eBike. You are welcome to ride your bike on the main road into the canyon, just be cautious of the shuttles. Most of the trailheads have a spot to park and leave your bike while you hike.
When traveling during the winter months, personal cars are allowed into the canyon, but keep in mind parking is limited.
Where to Stay in Zion

Zion is great because it offers options for every kind of traveler. From camping to Airbnb’s to budget friendly hotels, there is a good chance you will be able to find the right accommodation. Just be sure you plan ahead and book early. Since Zion is one of the most popular national parks in the US, accommodations can fill up quickly. For example, if you are visiting during peak season and are wanting to camp, you will need to book your campsite months in advance. You will find better deals and prices for hotels if you book sooner as well.
Other than campsites, most accommodations can be found in the town of Springdale. This is where you will find a majority of shops and restaurants as well. If Springdale is booked or doesn’t quite fit your budget, you can head down the road about 20 miles to the town of La Verkin or Hurricane. Staying in these towns will be slightly cheaper but will add about a 30 minute commute to the park.
Springdale Accommodation Recommendations
Red Rock Inn Cottages
Cable Mountain Lodge
Watchman Villas
Best Western Plus
Bumbleberry Inn
East Side Accommodation Recommendations
Zion Mountain Ranch
Best Western East Zion
Overlook Cabin
Campgrounds Near Zion National Park
Watchman Campground: Open year-round but need to reserve at least 6 months in advance
South Campground: Open year-round, currently closed for rehabilitation work
Lava Campground: Typically open May-September, about an hour from Zion
Hurricane Cliffs Dispersed Camping: About 30 minute drive to Zion
Please keep in mind if you plan on camping, Zion can get extremely hot during the summer months. So be sure to plan accordingly and have plenty of water.
Things to Do Around Zion
So you have explored the park but are now looking for some adventures outside of the park. Or maybe the park is just a little too crowded, but you still want an iconic Zion experience. Well, luckily Zion and the area around the park are full of great options for any kind of adventure. Here are a few of my favorite excursions to check out.
Jeep Tour
There is a good chance you have heard of Jeep tours or even been on one as they are very popular, especially in the southwest. Even if you have been on a Jeep tour before, don’t pass up the opportunity in Zion. We explored with a great company called Zion Jeep tours. You can choose from three different tour options and either join with a group or book a private tour. I highly recommend scheduling a time around sunset so you can capture the red rocks really show off during the golden hour. Depending on what type of tour you choose, will depend on what area you will meet the Jeep and depart.
Check out the photo below from our sunset Jeep tour!

Kalob Canyons of Zion
Kalob Canyons are located in the northwest corner of Zion National Park. This area of the park has way less crowds and offers a different side of Zion. You can find a 5 mile scenic drive as well as a few more hiking trails. If you are looking to have a more secluded hiking experience, your best bet is to check out the trails in Kalob Canyon.
Kenab

Sand Cave
Just north of Kenab is a treasure on the side of the road that you can’t pass up. Commonly known as the sand cave, this short scramble up leads you to a really cool piece of nature. As you might imagine, it is a cave that has been formed from the fragile rock eroding away into sand. The cave offers a few lookout onto the highway below. You will notice many people have carved their names, messages or drawings into the walls of the cave. PLEASE do not add to the destruction of this wonderful piece of nature. The best way to find the sand cave is download the AllTrails app and search “Kenab Sand Cave”. It will give you directions for where to park and show you how to make your way up to the cave.
Best Friends Animal Sanctuary
Kenab is a great eclectic town about 30 miles from the east entrance of Zion. There are two great spots I think are worth checking out in Kenab. The first is Best Friends Animal Sanctuary. This amazing place was the vision of a group of people to help stop the killing of animals in shelters in the United States. Today they house over 1,500 animals ranging from cats and dogs to horses and reptiles.
You can simply drive around the property or schedule a tour and check out the different animals. The Best Friends Sanctuary even offers places to stay, RV sites and lunch at the Angel Village Cafe. If you are an animal lover, which who are we kidding aren’t we all, this is definitely a unique experience.
See a photo you like in this post? Be sure to check out the photography section where you can purchase and frame any prints you love from this post or other posts on our website.
Gear Essentials
Park Pass– You will need a park pass to enter Zion National Park. There are three options for purchasing a pass for Zion. It is best to purchase these passes ahead of your visit, but if you are not able, you can purchase one on your arrival. Check out the National Park Service website to choose which pass works best for you.
Hiking boots or trail runners– Pay attention to the time of year you are visiting and possible hiking conditions, as that might help you better determine the appropriate shoe. If you are traveling during the winter months, be sure to look into spikes or snow cleats for your shoes.
Camelbak or Nalgene– You should always be prepared and hike with plenty of water. Even if you are hiking in the cold, your body needs to be replenished. Camelbaks are a great option to keep your hands free and you are likely to drink more water.
Camera– Of course you won’t be able to capture your pixel perfect memories without a camera. Camera preference is your own, DSLR, GoPro, smart phone, etc.
Hat & Sunglasses– Since you are hiking up in elevation, you are more prone to sunburn. Be sure to protect your skin! Check out Amazon for some great deals!
Hiking Poles– I would recommend these if you have any knee issues as they are very helpful especially on the decline of many hikes. If you are unfamiliar with what hiking poles are best for you, I recommend checking out REI and seeing all of their great outdoor gear.
Jacket– No matter what time of year you take this trip, be sure to pack some sort of jacket. Even in the summer months, the desert gets cool at night. Check out The North Face or Patagonia for some great outdoor apparel.
Snacks- You can’t forget the snacks! With all of the hiking and exploring, you will also want snacks to fuel your body so you can keep up with your adventures. You use and burn more energy than you think hiking, so be sure to pack some high energy and salty snacks.
If you venture out onto this epic road trip or hope to one day, be sure to leave a comment about your favorite part of park, favorite trail or what you are looking forward to the most! If you liked this post, please share with your friends and family. Also, be sure so sign up for our exclusive emails and resources.
Remember to always respect our wonderful planet, national parks and lands and leave no trace. Happy hiking!
All photos used in this post and on our website are taken by and owned by Pixel Perfect Travel and it’s owner. All photos are available for purchase. If you would like to use any photos please contact us! We appreciate everyone respecting our creative content.