
Hoodoo you do? I’m great, thanks for asking! I am doing well because I am excited to share all of my travel tips and information in this complete travel guide to Bryce Canyon National Park! Don’t worry, I will try to keep my hoodoo jokes to a minimum. Bryce Canyon National Park quickly became one of my favorite national parks that I have visited so far. This park is frequently overlooked due to a couple of nearby parks that you might have heard of… Zion and the Grand Canyon. Although, Bryce Canyon has some big name neighbors, it is not to be missed!

Before we get started, lets do a quick geography lesson. One thing to know about Bryce Canyon is that it is not actually a canyon, confusing I know.
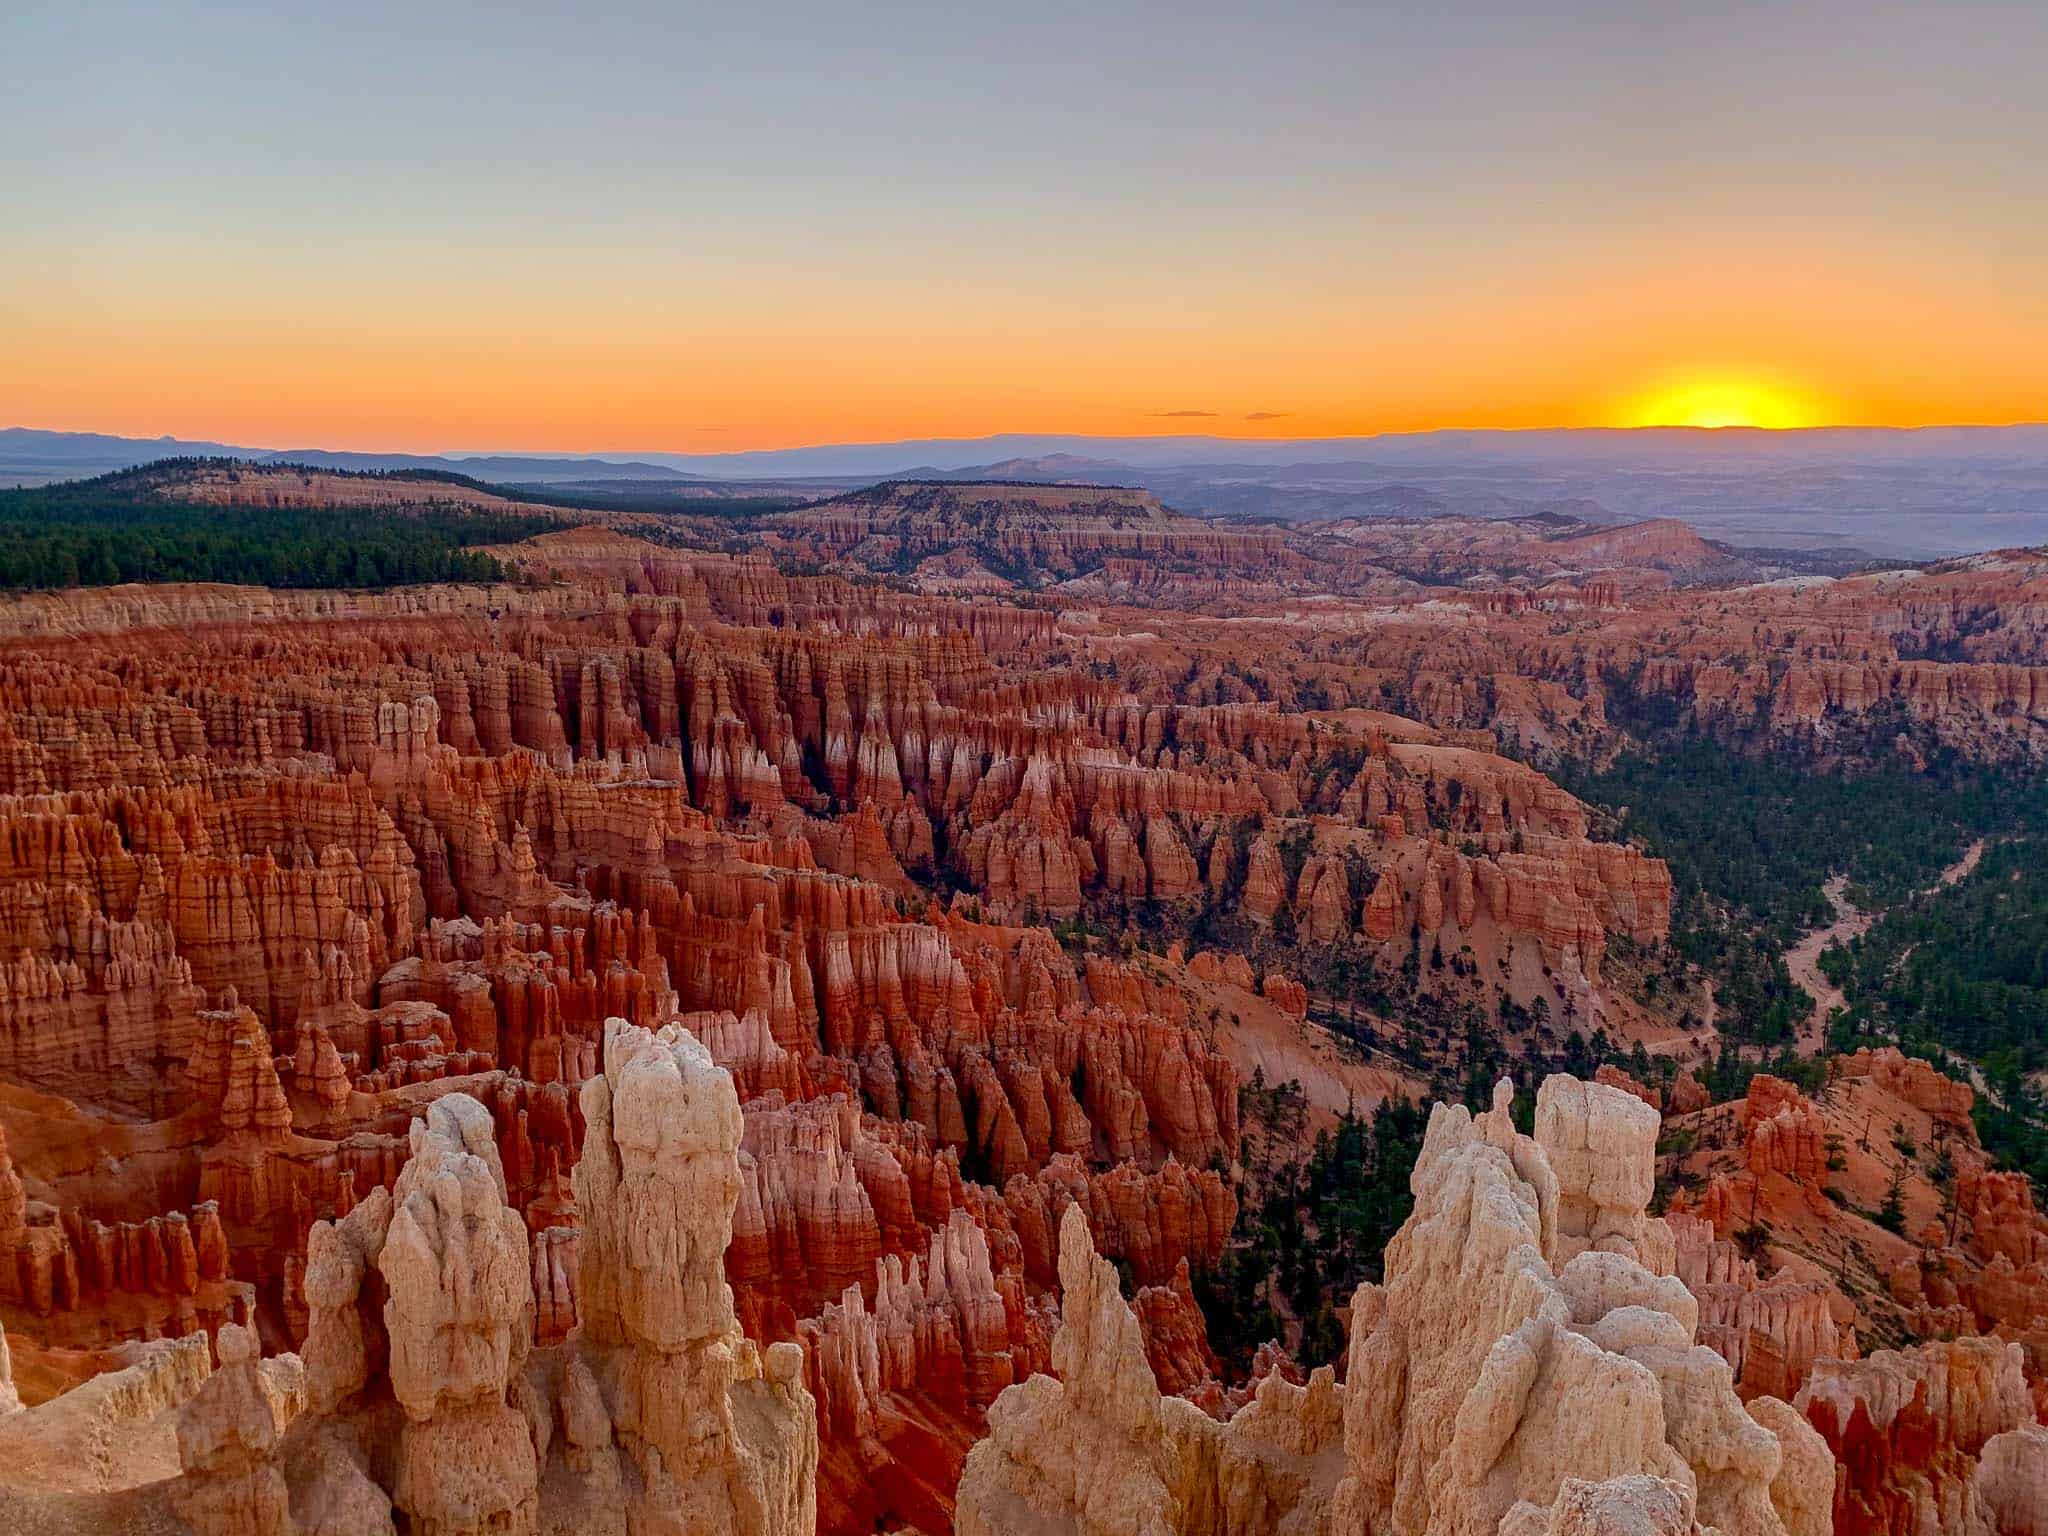
Bryce Canyon is actually part of the Paunsaugunt Plateau where visitors look over the edge into a valley where the Pausaugunt Fault lies. The tall orangish, red pillars, known as hoodoos (what Bryce Canyon is famous for), were formed from erosion of soft and hard rocks. These hoodoos lie in several amphitheaters with the most popular being Bryce Amphitheater. Nature is pretty mind blowing! Okay, now that we have that extra tidbit, let’s get to some travel tips!
Looking for specific information about Bryce Canyon? Follow one of the links below to quickly find what you are looking for:
When to Visit Bryce Canyon
Bryce Canyon National Park is open all year, 24 hours a day, so you can visit whenever your heart desires. But here are a few things to keep in mind.
Bryce Canyon has many things to offer depending on when you visit. However, just like other national parks there are peak seasons and off seasons. Bryce Canyon’s peak season is between the months of May and September. During these months, you will find a majority of the park and roads open. Also, if you are traveling as a family and have younger adventurers in your group, this is the time of year the park offers the most ranger activities. Just keep in mind, peak season usually means more people and crowds.

Unlike it’s nearby neighbor Zion National Park, Bryce Canyon does not normally reach extreme high temperatures during the summer months. On average, the day time highs between May and September range from the 60s to the 80s Fahrenheit. A helpful tip to remember, if you are in the park to catch a sunrise or stargazing it can still be chilly in the summer months.
Although it is always great to visit during peak season, there are a couple of downsides you might want to consider. Other than there being more crowds, accommodations and certain activities will most likely be priced higher. So if you are able to be flexible in your travel dates and are on a budget, I recommend visiting during the off season or right at the beginning or end of the summer months.
Now if you are wanting to visit Bryce Canyon when there are less crowds, then your best bet would be between October and April. Snow can start to fall as early as October, which can make for some stunning Pixel Perfect photos. Just be sure to dress warm. Bryce Canyon usually receives the most snowfall in the month of February and experiences the coldest temperatures in December.
Something to consider if you plan on visiting during this off season time frame, is some trails and roads may not be open due to weather conditions. Also, visitor centers and ranger activities might operate on less hours. So, just be sure to have a few backup options and be prepared to go with the flow. With snowfall and potential ice on hiking trails, you will also want to check if you require different hiking gear.
Even though most people may not visit during this time, there are benefits to visiting Bryce between October and April. You will enjoy hiking trails with less crowds and less parking headaches. Another benefit is cheaper, and easier to find accommodations. So be sure to list out what is important to you (less crowds, cheaper accommodations, more trail options) and then book your dates and pack your bags!
Ideally, you can see a lot of the park in 1-2 days. We visited Bryce Canyon while on a 10 day trek through Utah’s Mighty Five. I highly recommend staying at least one night so you can do some stargazing & catch a sunrise! Keep reading for more details about both of those experiences.
Bryce Canyon Hiking Trails
Compared to other national parks in the area, Bryce Canyon is on the smaller side. The benefit that comes with a smaller park, is it is very doable to cover a lot of ground in a short amount of time. Bryce Canyon definitely offers some great lookout points and a short scenic drive for you to see the highlights of the park. However, I feel as though you can’t truly appreciate it’s beauty and uniqueness until you set foot in and explore the amphitheater and hoodoos from the trails.
Here are some of my favorite trails at Bryce Canyon National Park.
Wall Street & Queens Garden Loop to Peekaboo Loop (Figure Eight Loop)
Alright, so this trail is definitely a mouthful but is it a must do in Bryce Canyon. This is a great option because it is actually several trails all connected into one giant trail, so you can see a lot of the popular spots. This Figure 8 trail allows you to see the famous Wall Street, complete the popular Queens Garden Loop and adds in the Peekaboo Loop which helps you get away from some of the crowds.

We started this trail at Sunset Point and completed it counterclockwise so we descended down Wall Street instead of up. If you aren’t familiar, Wall Street is a series of switchbacks surrounded by great walls of hoodoos that make for some pretty epic photos.
After descending Wall Street, you will complete part of the Queens Garden Loop. You will eventually reach a fork in the trail leading to the Peekaboo/ Navajo Loop trail. This is where you will start to see less crowds.
This portion of the trail has several natural arches and more great pixel perfect photo opportunities. Something to keep in mind is, part of this loop is also a horse trail so you might have to watch your step! Also, if you do encounter visitors on horseback, be sure to let them pass before continuing on the trail. Once you finish the Peekaboo Loop, you will link back to the other half of Queens Garden and finish back at Sunset Point.
Pro tip for hiking this trail:
Catch the sunrise at Inspiration Point, then head to Sunset Point to start this trail. This allows you to start early beating the crowds and the heat (if visiting in the summer). As the day goes on, this trail becomes very busy. As some of the first people to hit the trail, we were able to get a couple of photos of Wall Street without many people in our photos, like you see above.
Moral of the story, start this one early!
If you are not up for hiking all of these trails in one hike, you can definitely break them up and only hike just one or hike them over multiple days.
Trail Stats:
Distance: 6.5 mile loop
Elevation Gain: 1,500 feet
Estimated Duration: 3-4 hours
Difficulty: Moderate
Tower Bridge Trail
Tower Bridge is a great trail that takes you away from the crowds a little bit. You definitely still encounter other hikers, but it is less trafficked than popular trails like Queen Gardens Loop. Once you are in the Bryce Amphitheater, everywhere you look you will see hoodoos. As beautiful and unique as they are, they start to all look the same. The Tower Bridge trail offers a little variety in scenery and in my opinion the hoodoos are shaped a slightly different.

The trailhead begins a little north of Sunrise Point. Once you begin this hike, you will make a steady descent into the amphitheater. The scenery is a little different than the scenery of the Figure 8 trail. On the Tower Bridge trail you will see a little more greenery and trees which makes for great pops of color for your pixel perfect photos. You will not be rewarded with a view of the Tower Bridge until you reach the end of the trail. Be sure to spot the single tree through the natural made hole at the end of the bridge.
The hardest part of this trail is the hike back. Remember you began by making a steady descent into the amphitheater, so now you have to hike back up. Don’t underestimate this hike, especially if you are hiking midday as there is not much shade, so be sure to be prepared with plenty of water.
Trail Stats:
Distance: 3.5 miles out & back
Elevation Gain: 846 feet
Estimated Duration: 1-2 hours
Difficulty: Moderate
Fairyland Loop
If you would like to extend your hike from Tower Bridge, you can continue on the Fairyland Loop as it will bring you back to Sunrise Point. If you complete the entire loop, it is about a 9 mile hike (AllTrails says it is 7.8 miles). Many people recommend completing this trail clockwise. Again, there are not many opportunities for shade so be sure to pack plenty of fluids and sun protection. The Fairyland Loop is a great option if you are looking to get away from the crowds.

Trail Stats:
Distance: 9 miles loop
Elevation Gain: 1,545 feet
Estimated Duration: 4-5 hours
Difficulty: Moderate
Bryce Canyon Rim Trail
This trail is exactly what the name insists, a hike along the rim of the Paunsaugunt Plateau overlooking all the hoodoos. The Bryce Canyon Rim Trail takes allows you to stop at all of the lookout points and you can always turn around at any point. Also, part of this trail is paved which makes it a great option for visitors who may not be physically able to make their way down into the amphitheater.
Trail Stats:
Distance: 10.7 miles out & back
Elevation Gain: 1,587 feet
Estimated Duration: 1-2 hours
Difficulty: Moderate


Can’t Miss Experiences in Bryce Canyon
Hiking is for sure a must do experience in Bryce Canyon National Park but there are a few other things I feel like you can’t miss in this park.
Catch a Sunrise
Since Bryce Canyon is a plateau with the hoodoos formed in the amphitheater below, you are limited on the angles of your views. With that in mind, if you want to see the bright orange and red colors of the hoodoos show off, you MUST catch them at sunrise. There are a few lookout points, Inspiration Point, Sunset Point, Sunrise Point and Bryce Point.
You would think with a name like Sunrise Point that would be the ideal spot. Think again. From my experience (and the confirmation from a park ranger), Inspiration Point is the best viewpoint for sunrise. However, any of the four mentioned viewpoints will still give you an incredible Pixel Perfect photo.

A few things to keep in mind for your sunrise adventure:
- Give yourself plenty of time to drive to the viewpoint and get any camera equipment set up before the sun actually comes up.
- Pack layers. Even in the summer months, we found ourselves adding on layers in the early morning as it was chilly.
- Another item to consider bringing is a towel or blanket to sit on as it is a bit rocky and dusty. Not a necessity, just something to consider!
Stargazing
If you woke up early to catch the sunrise, you might as well stay up late to catch the stars. Bryce Canyon is a certified Dark Sky park. What does that mean? Well, the Dark Sky Association recognizes areas that have limited light pollution to protect natural, true darkness. This also allows researchers to study our skies and protects many nocturnal species.

Just like there isn’t really a bad option for a sunrise spot, there isn’t a bad spot to stargaze. We happened to follow the guidance of a park ranger who recommended heading to Bryce Point. This is also where you will find the trailhead for the Peekaboo trail.
We had this spot to ourselves as there are many places to spread out. Honestly, it was a little eerie knowing the hoodoos were below us but hard to see and we were extra careful about where we walked (not many areas have railings). We did spy a few hikers hiking below with headlamps which would be another cool adventure.
The funny thing about this experience is, we started heading back to our car and found the view of the Milky Way SO much better from the parking lot. The photo above is from the parking lot… never underestimate a good parking spot. But again, I don’t think you can really go wrong with any spot you choose to stargaze, just don’t miss out on the views above your head!
Scenic Drive to Rainbow Point
Whether you are crunched for time or just wanting to give your legs a rest from all of your hiking, the scenic drive is definitely worth your time. Compared to other scenic drives, I would consider this one relatively short which is why I suggest you can do it even if you are pressed for time. There are many pullout options to view the park and hoodoos from different perspectives. One section even shows you some of the damage from a previous wildfire.
Once you reach the end of the road, you have reached Rainbow Point. Here you will find plenty of parking, restrooms and picnic tables. Rainbow Point is one of the highest points in the park and provides a little bit different scenery as the view is not full of hoodoos. You are able to see hoodoos, forests, mountain peaks and cliffs.


Where to Stay
Bryce Canyon is a relatively small park and is a little more remote than nearby parks. If you are looking for hotels or RV spots, your best options would be in the towns of Bryce Canyon City or Tropic, Utah. If you are planning to camp, there are plenty of campgrounds in and around the park as well. Just be sure to check availability and schedule early as they can book quickly depending on the season.
We stayed at Ruby’s Inn and had a fantastic experience. Very affordable and right by the entrance to the park which made our early sunrise and late stargazing adventures a little easier. Ruby’s Inn is also an RV campground and has laundry services as well as a full buffet breakfast option. There is a small grocery store and souvenir shop. They’ve got it all in a town that is relatively small!
See a photo you like in this post? Be sure to check out the photography section where you can purchase and frame any prints you love from this post or other posts on our website.
Gear Essentials
Hiking boots or trail runners– Pay attention to the time of year you are visiting and possible hiking conditions, as that might help you better determine the appropriate shoe. If you are traveling during the winter months, be sure to look into spikes or snow cleats for your shoes.
Camelbak or Nalgene– You should always be prepared and hike with plenty of water. Even if you are hiking in the cold, your body needs to be replenished. Camelbaks are a great option to keep your hands free and you are likely to drink more water.
Camera– Of course you won’t be able to capture your pixel perfect memories without a camera. Camera preference is your own, DSLR, GoPro, smart phone, etc.
Hat & Sunglasses– Since you are hiking up in elevation, you are more prone to sunburn. Be sure to protect your skin! Check out Amazon for some great deals!
Hiking Poles– I would recommend these if you have any knee issues as they are very helpful especially on the decline of many hikes. If you are unfamiliar with what hiking poles are best for you, I recommend checking out REI and seeing all of their great outdoor gear.
Jacket– No matter what time of year you take this trip, be sure to pack some sort of jacket. Even in the summer months, the desert gets cool at night. Check out The North Face or Patagonia for some great outdoor apparel.
Snacks- You can’t forget the snacks! With all of the hiking and exploring, you will also want snacks to fuel your body so you can keep up with your adventures. You use and burn more energy than you think hiking, so be sure to pack some high energy and salty snacks.
If you venture out to explore beautiful Bryce Canyon, be sure to leave a comment about your favorite part of park, favorite trail or what you are looking forward to the most! If you liked this post, please share with your friends and family. Also, be sure so sign up for our exclusive emails and resources.
Remember to always respect our wonderful planet, national parks and lands and leave no trace. Happy hiking!
All photos used in this post and on our website are taken by and owned by Pixel Perfect Travel and it’s owner. All photos are available for purchase. If you would like to use any photos please contact us! We appreciate everyone respecting our creative content.